過去のブログのアーカイブ
この記事は前身のブログのアーカイブを引き継いだものです.
画像が正しく表示できないなど,コンテンツの表示に問題がある恐れがあります.C#では標準でINIファイルを操作することが非常に面倒になっています。
というわけでINIファイルを簡単に編集できるライブラリを作ってみた。
説明
INIファイルを操作するのに必要なWinAPIは以下の3つ
- GetPrivateProfileString
- WritePrivateProfileString
- GetPrivateProfileStringByByteArray
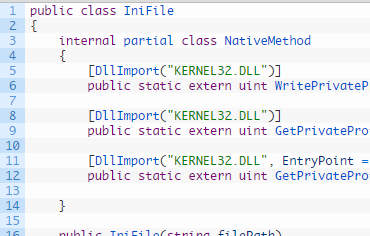
ソースコード
public class IniFile
{
    internal partial class NativeMethod
    {
        [DllImport("KERNEL32.DLL")]
        public static extern uint WritePrivateProfileString(string lpAppName, string lpKeyName, string lpString, string lpFileName);
        [DllImport("KERNEL32.DLL")]
        public static extern uint GetPrivateProfileString(string lpAppName, string lpKeyName, string lpDefault, StringBuilder lpReturnedString, uint nSize, string lpFileName);
        [DllImport("KERNEL32.DLL", EntryPoint = "GetPrivateProfileStringA")]
        public static extern uint GetPrivateProfileStringByByteArray(string lpAppName, string lpKeyName, string lpDefault, byte[] lpReturnedString, uint nSize, string lpFileName);
    }
    public IniFile(string filePath)
    {
        this.FilePath = filePath;
        if (!File.Exists(FilePath))
            File.Create(filePath).Close();
    }
    public string FilePath { get; set; }
    public string this[string section, string key]
    {
        get
        {
            return this[section, key, null];
        }
        set
        {
            NativeMethod.WritePrivateProfileString(section, key, value, this.FilePath);
        }
    }
    public string this[string section, string key, string def]
    {
        get
        {
            StringBuilder sb = new StringBuilder(1024);
            NativeMethod.GetPrivateProfileString(section, key, def, sb, (uint)sb.Capacity, this.FilePath);
            return sb.ToString();
        }
    }
    public string[] GetSections()
    {
        byte[] ar2 = new byte[1024];
        uint resultSize2 = NativeMethod.GetPrivateProfileStringByByteArray(null, null, "", ar2, (uint)ar2.Length, this.FilePath);
        string result2 = Encoding.Default.GetString(ar2, 0, (int)resultSize2);
        string[] sections = result2.Split(new[] { '\0' }, StringSplitOptions.RemoveEmptyEntries);
        return sections;
    }
    public string[] GetKeys(string section)
    {
        byte[] ar1 = new byte[1024];
        uint resultSize1 = NativeMethod.GetPrivateProfileStringByByteArray(section, null, "", ar1, (uint)ar1.Length, this.FilePath);
        string result1 = Encoding.Default.GetString(ar1, 0, (int)resultSize1);
        string[] keys = result1.Split(new[] { '\0' }, StringSplitOptions.RemoveEmptyEntries);
        return keys;
    }
    public void DeleteSection(string section)
    {
        this[section, null] = null;
    }
    public void DeleteKey(string section, string key)
    {
        this[section, key] = null;
    }
}
使い方
結構シンプルに扱うことができ、初期化の際にファイルパスを指定してあげるだけです。
存在しないファイルパスを指定した場合、新しいファイルが作成されます。
// iniファイルを開く。存在しない場合は新規作成
IniFile ini = new IniFile(Environment.GetFolderPath(Environment.SpecialFolder.Desktop) + "\\test.ini");
// 書き込みをする
ini["section", "key"] = "test";
// キーを削除する
ini["section", "key"] = null;
ini.DeleteKey("section", "key");
// セクションを削除する
ini["section", null] = null;
ini.DeleteSection("section");
// セクション一覧を取得する
string[] sections = ini.GetSections();
// キー一覧を取得する
string[] keys = ini.GetKeys("section");
WinAPIを使用してINIファイルを操作しているため、ファイルを読み書きするたびにファイルを開いています。そのため、ファイルを閉じる作業は必要ありません。
ファイルを自動作成してほしくない場合は、IniFileクラスの初期化部分を編集してください。